If you don’t know what soil blocking that’s okay… we will start from the beginning.
What’s soil blocking?
Soil blocking is a seed-starting method created by a tool compressing soil into a free-standing shape, most often a cube shape. The cube of soil called a soil block is made up of various organic mediums that hold their shape without a container.
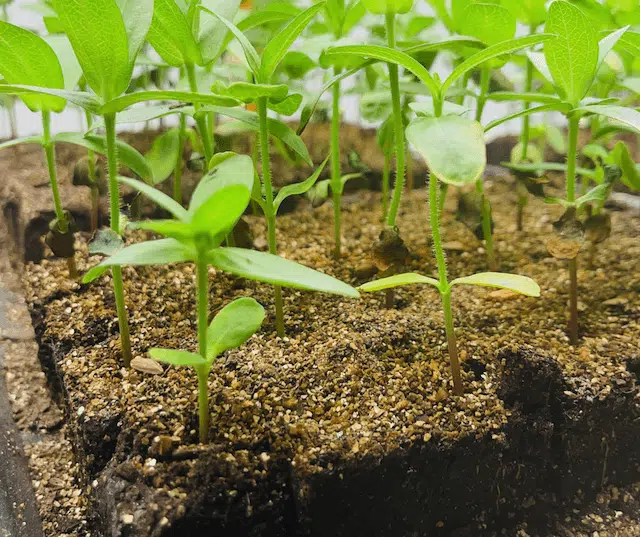
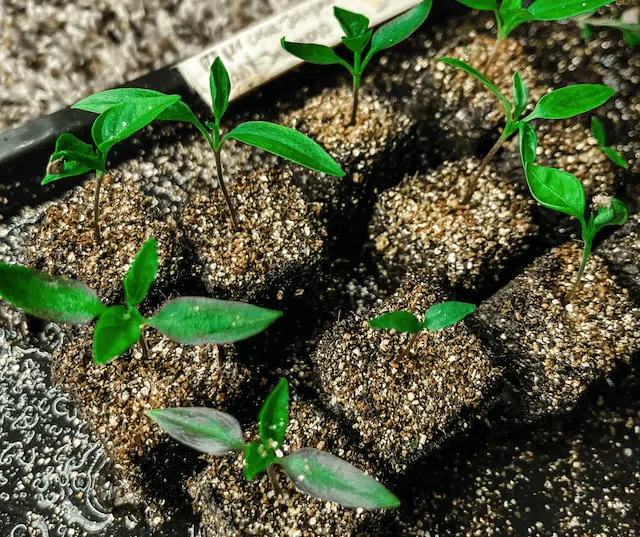
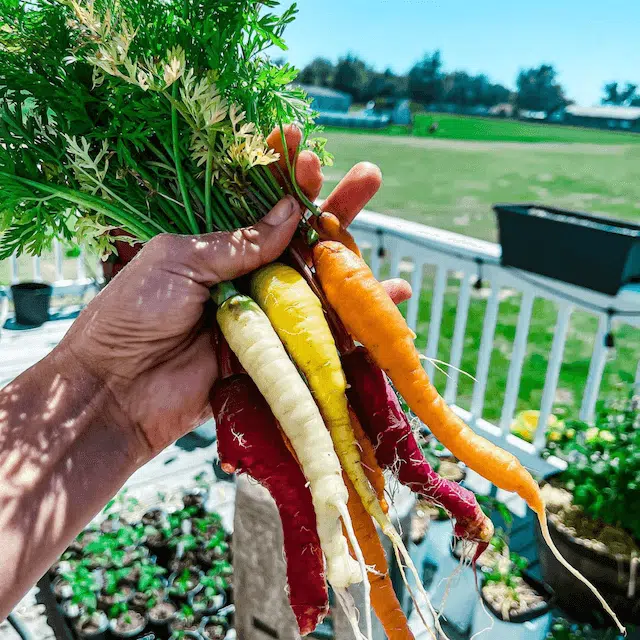
A soil block can be used to grow all different types of plants including food, flowers, herbs, and even tree seeds.
It is a self-sufficient seed starting method that exposes plant roots to the air helping them produce new healthy roots without constricting them.
This process is called “air pruning,” as it lets roots immediately get used to their new surroundings preventing transplant shock.
How do you block soil?
You can block soil in a couple of ways, either by creating a DIY soil blocking tool, using the Aztec method of cutting out blocks in soil or by buying a tool called a soil blocker.
A soil blocker is a tool that compacts a soil mixture manually when you push down the handle of the tool. There are many different sizes of soil blockers, we will discuss all the different sizes of soil blockers later in this post.
Now that you have an idea of what soiling blocking is and what soil blockers are, we will explain the history of this great self-sufficient seed starting method.
The History of Soil Blocking
So, who first started using the soil blocking method?
Well, soil blocking is not a new way to start vegetable or flower seeds. This seed starting method goes back about 2000 years ago when the Aztecs in central Mexico created the “Floating Garden,” also known as Chinampa farming.
Chinampa farming has an island that was surrounded by water and had drainage canals that collected mud. The mud from the canals would be spread over weeds, left to dry, and then cut into mud-like blocks.
When mud-like blocks dried up enough to cut out in square shapes they were called “chapine.” The farmer would place a seed in the middle of the block and cover it with more dirt/mud.
This was the start of the first “soil block” that would be used to grow food.
Willow trees would hold up the mud in the canals and every year mud would be added to the chinampa. The soil block method invented by the Aztecs was used to grow flowers as well as food like tomatoes, corn, peppers, beans, etc.
Years later the Spanish took over the Aztec but then they continued to use the soil blocking method to grow many crops.
For the last 100 years or so the Europeans have been evolving the soil blocking method and created a commercial product called the soil blocker.
Michael Ladbrooke invented the first tool called a soil blocker to make the method of soil blocking easier to do. The soil blocker became the perfect tool for home gardeners and farmers, as it allows you to make the perfect size blocks in mass quantities.
A man named Eliot Coleman advertised and educated people about the soil blocking method. His TV shows, books, and multiple speaking events helped him reach and teach thousands of people about soil blocking.
He showed people how to use it, shared his soil blocking recipe mix, and educated the world on how to be self-sufficient gardener.
Pros of Soil Blocking
Can make seed starting Less expensive in the long run.
You can plant more seeds in a small space. (you can fit almost 100 plants in one tray!)
Provides you with a self-sustainable way to garden.
Gives your plants great moisture from the beginning
Provides ideal conditions right away for your seedlings
Extremely efficient
Helps you avoid transplant shock
Prevents your plants from becoming root-bound
You get a healthier root system
Provides amazing air circulation between all your seedlings
Cons of Soil blocking
Up-front costs can be expensive
Might take some time to master
Seeds starting may take longer if making your soil mix
Soil blocks can be more fragile compared to using pots or seed-starting kits
Soil blocks might dry out faster
More attention may be needed to take care of soil blocks.
Soil Blocking Material & Supplies
If you are not DIYing your soil blocker, then buying the right tools is important if you want a great soil block. Some of the soil-blocking supplies are upfront costs but this initial investment will pay off in the long run because you will not need to them buy again.
Below are all the links to the materials and supplies you will need to soil block.
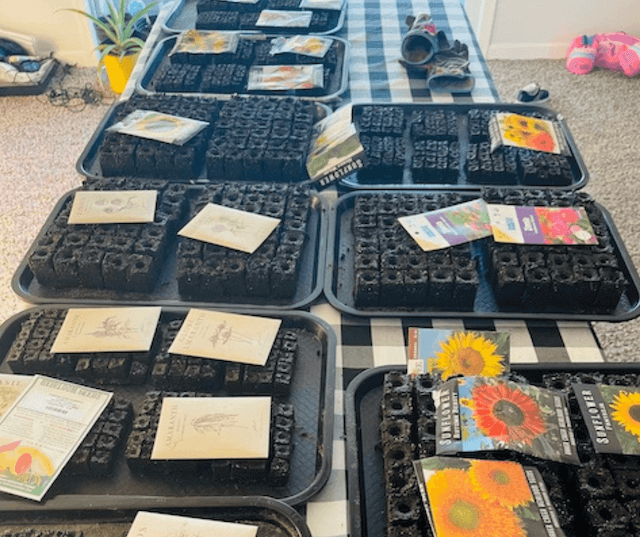
Soil blocking trays
Soil-blocking trays are needed to help you water your soil blocks and keep them safe.
Trays protect soil blocks from their surroundings and keep them contained in one place. This helps you keep organized as your plant’s seeds grow.
Growing trays
You can use these trays to hold your soil blocks. I found that it’s hard for the soil blocks to soak up the water with these trays. I bottom water my seedlings, so if you bottom water as well this tray might not be the best.
Cafeteria trays
I prefer cafeteria trays as my tray of choice for my soil blocks. They are sturdy, large enough to hold plenty of soil blocks, and will last for a long time. They won’t break the bank and are very easy to store.
DIY soil blocking trays
Recycled Meat Trays
These are styrofoam trays you get when you buy meat products. This tray is a very inexpensive way to hold your soil blocks.
After you clean them well, you can have a cheap tray that can hold just enough water for your soil blocks. You can your soap and water or place them in water and vinegar to give them an extra cleaning.
Build Wood trays
Another great DIY tray is building one out of wood. You will need long enough wood that can be nailed together to make a tray shape.
Below is a great DIY seed tray video!
Bottom watering with these trays will be a little difficult. This tray will not hold water unless you place a barrier on the bottom of the soil blocks to help hold water.
Nevertheless, making your trays to hold your soil blocks is a great DIY project to do.
Different Types of Soil Blockers
¾ inch soil Blocker
This is the mini soil blocker out of all the soil blockers in the market. This blocker is great for tiny seeds or seeds that take a long time to germinate.
With this soil blocker, just using it once provides you with 20 small blocks of soil. You can start 20 seeds in a small space with this soil blocker.
There is small ideation that is created when you use the soil blocker. It doesn’t leave a big hole to put a big seed in, but it gives a small indentation instead.
This helps you plant the tiny seeds efficiently so you can plant all types of flowers, herbs, or even vegetables.
1 1/8 inch Soil blocker
This size blocker is great for all types of seeds and can be used for flowers and vegetables.
From big seeds to small ones, this blocker can be very diverse as it can hold plenty of different sizes of plants. The priciest soil blocker in the market, this tool will be an investment for a market gardener or someone who grows tons of foods o their own. (I have one and it saves me a lot of time!)
2-inch Soil Blocker
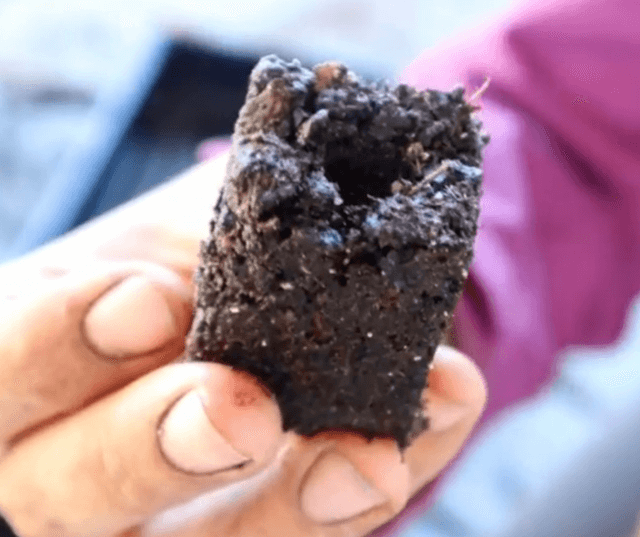
This size soil block is universal since you can start all types of seeds in a two-inch blocks. I have started from very small seeds to larger seeds, and the 2-inch blocks never disappoint.
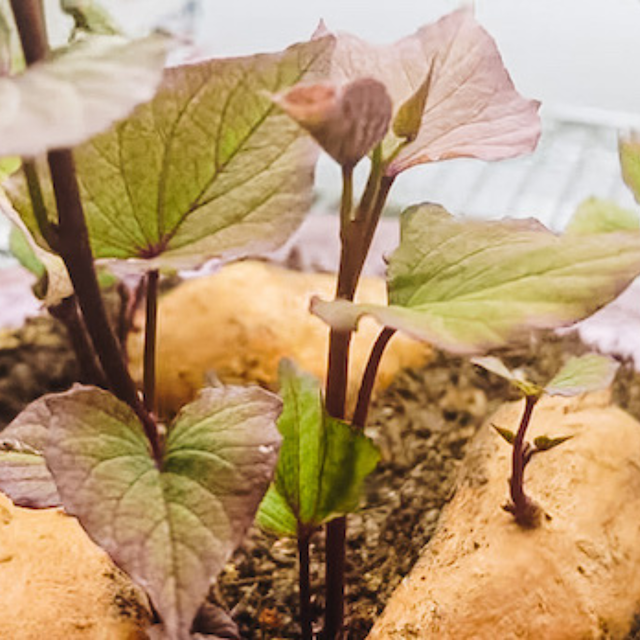
Great to start bigger seeds in like sunflowers, corn, peas, and even moringa tree seeds! (I’ve started plenty of Moringa tree seeds in soil blocks, look at one below! )
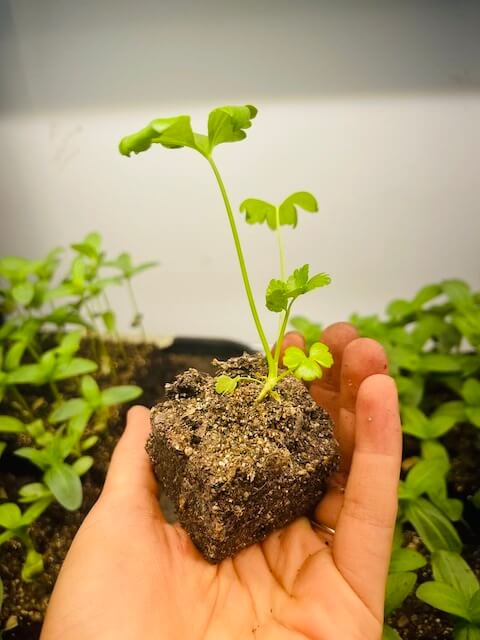
3-4 inch Soil Blocker
The biggest size soil blocks make large soil blocks for seedlings that have outgrown their 2-inch block. You can tell a plant needs to level up to a 4-inch block by the number of roots it has and how top-heavy it may be.
Four-inch soil blocks take up a lot of soil so you will need to make sure you have a good amount of soil block medium.
Cheaper Soil blocker Choices
Soil Blocking Accessories
Soil block Cubic Insert
Cubic inserts are used to replace the middle part of a 2-inch soil block when you are moving up your seedlings. The insert is the same size as a 4/3-inch soil block so seedlings planted in a 3/4-inch block will fit nicely and snugly into a 2-inch soil block.
How to Change your Soil Block Inserts
First, you turn over your soil blocker to see the underside
Then pinch out the sides of the insert that is already in the blocker and remove it
Add the new insert by aligning it and rotating it into the soil blocker
A clicking sound will let you know it is successfully inserted.
Potting tray
Perfect for the home gardener, a potting tray to place for soil mix-in helps with soil blocking. Portable, prevents mess and you can easily place this on top of a tabletop. Home gardeners can use this for multiple things and not only to make soil blocks.
How do you make homemade soil blockers?
For all my visual learners out there, below is a video that shows you how to make your soil blocker.
What do you put in soil blocks?
To make soil blocks successfully you must mix certain mediums with water to make the perfect consistency of soil that will hold together.
Besides having a great soil blocking recipe mix, it’s important to know what each growing medium is as they are potential ingredients that will contribute to making healthier plants.
Below we have broken down all the different kinds of mediums used in soil blocks.
Compost: organic matter
Compost is considered an organic matter that is made up of recycled food scraps, plants/leaves, and cardboard.
All of these products break down with the help of worms, and other organisms.
Compost eventually breaks down into the soil and is used when completely decomposed.
This soil blocking medium is the only one you can make yourself!
Peat moss
Peat mossis made up of the chemical breakdown of dead plants, and vegetables that are dried to make peat. Some people do not consider eco-friendly as others do.
Peat moss helps with soil aeration when mixed with perlite. Both hold moisture very well. According to Science Daily, “Peat moss can hold more than 25 times its dry weight in water, which is much more than natural sponges do.”
It helps creates air pockets in the soil that helps with plant/soil diseases since it’s a sterile product.
This medium can help bring down the PH of the soil and adds substance to sandy soil. For the ones who are against using peat moss for environmental reasons using coconut coir can also be a great alternative to peat moss.
Perlite
According to Britannica.com, perlite is also called pearlstone, and “it is formed by the rapid cooling of viscous lava or magma. https://www.britannica.com/science/perlite
Perlite comes in a bag and looks like small white pebbles, and it helps by adding oxygen to the soil. Like peat, perlite retains water in the soil, as it is also a sterile product that has a natural Ph to it.
Azomite
Azomite is made up of ancient volcanic ash deposits from about 30 million years ago in Utah. This amendment naturally re-mineralizes plants inside and outside, it is also known to have over 70 trace minerals from the earth in it.
Great for organic gardening and can be safely applied in compost, fertilizers, and soil without burning plants.
This rock dust is a great addition to soil blocks and overall, a great amendment to use around your garden.
Greensand
Greensand is made up of the blue-green mineral glauconite that is
harvested from ocean floors. This amendment is used to hold loose sandy soil together as well as heavy clay soil.
It can hold up to 1/3 of its weight in water and helps to improve the moisture in potting mixes and garden soil.
It has about 30 trace minerals in it and has an NPK of 0-0-3. According to dgs.udel.edu, greensand has 90% glauconite and 10% quartz and the only greensand mine currently in the Us is in New Jersey.
Blood meal can deter pests from the garden and can also be used to active compost.
Overall, a blood meal is one of the best and richest sources of nitrogen!
Lime
According to braenstone.com, there are two different types of Lime. One is called Agricultural lime which is made of limestone turned into fine powder.
The other is called dolomite lime which is dolomitic limestone broken down.
Dolomitic lime is less expensive and easier to get. You can get this type of lime in big box stores or online.
Regardless of the type of lime, both are great soil amendment that alters soil ph to create a more alkaline and less acidic soil. Lime also has great sources of magnesium, and calcium to help improve your soil.
Overall, the sole purpose of adding lime is to make the soil less acidic.
Colloidal Phosphate
According to dfmineralgrow.com, this medium also known as “calphos soft rock phosphate, is an organic fertilizer that is used as a long-term, steady distributor of phosphate.”
The main purpose of this medium is to help increase phosphates in your soil.
Soil blocking Mix Recipes
Finding a soil blocking mix you have success with can take some time, but you must start somewhere.
You can make your own, just keep in mind practice makes perfect!
Whatever you choose to do, either learning how to make soil blocking mixes, buying a mix, or using a recipe from someone else, it is nice to know if a soil blocking recipe showed great results.
So how do you get soil blocks to stick together? Try using one of the successful soil blocking recipes below.
1.) Elliot Coleman’s Recipe from his book: From the new Organic grower
Mix all these mediums thoroughly.
Use a 10-quart bucket for these ingredients: Peat moss (3 bucket fulls)
Perlite or Sand ( 2 bucket fulls)
Compost (2 buckets)
Regular soil (1bucket)
Use a standard cup for these ingredients:
Lime ( ½ cup)
Mix equal parts of blood meal, greensand and colloidal phosphate (3 total cups of the mix)
2.) My soil block recipe & Video
Use any size container or bucket to use for measuring, each part is one full container/bucket you choose. For your cup measure any size cup you wish.
Compost (3 parts)
Peat moss (3 part)
Blood meal (1 cup)
Azomite ( 1 cup)
Lime (1/2 cup)
Perlite (2 part)
3.) This video is of Jim an urban market garden farmer who does thousands of soil blocks a year. He shows how he creates his soil block mix.
4.) Elliot Coleman’s video on another great soil blocking mix.
How to use a soil blocker?
With just a couple of easy steps, you can make a soil block with a soil blocker.
Below are instructions on how to use soil blockers with photos!
Step 1
First and foremost, incorporate all ingredients in a container that is big enough to fit a soil blocker in. (depending on your soil blocker size)
Step 2
After mixing all the mediums water the mixture little by little until you get a brownie-like consistency.
Your mix after adding what should be wet enough that when you squeeze the soil mix in your hand a little bit of water should seep out. You need wet soil and the right consistency to make your own soil blocks.
Step 3
The second is to get your clean soil blocker and press it into the mixture you created. Press the soil blocker into the dirt mixture 3-5 times or until the soil blocker is filled with soil.
Ensure all the chambers are full of the soil mixture
By making a twisting motion press the soil blocker into the soil block mixture as it helps to get all the mixture into the blocker.
Step 4
Get a tool to scrape the excess soil off the bottom of the blocks. You are creating a nice smooth surface at the bottom of the soil blocker.
Step 5
Place the soil block down on your tray and release the mechanism that creates the soil blocks. By depressing the plunger and ejecting the blocks you can see the form of the block and the indentation of where you will put your seed.
NOTE: No need to water the first soil blocks as they would be nice and moist.
How do plant seeds into Soil blocks?
Sowing seeds into soil blocks is very simple and convenient since a soil blocker creates an indentation to place a seed.
You can also use a pencil tip to help you sow tiny seeds into the indention or you can poke into the indentation to make it bigger.
After you place your seeds in the middle of the soil blocks cover them with excess soil or sprinkle vermiculite on top.
Vermiculite is used on top of seeds to help retain moisture and keep nutrients in.
What are the benefits of soil blocking?
There are a lot of benefits of soil blocking, some benefits include:
Makes stronger root systems of a plant because of the air pruning that happens.
It cuts down plastic waste and is Eco-friendly
Saves you money on seed starting material in the long run
You don’t need a lot of space to grow using soil blocks
Avoids transplant shock when transplanting
Creates healthy plants that do not get root bounded
Soil Blocking Care Tips
A key to successful soil blocking is the amount of moisture in your mix. Creating a “brownie mix consistency” is a good reference to go by.
You can use cinnamon on top of your soil to help prevent and control algae or damping off.
Sow bigger seeds in 1&1/2 or 2-inch soil blocks and as deep as you a get them without touching the bottom
Sow max 2 seeds per soil block to help with your chances of germination.
Pack soil into the soil block as much as you can. There is no such thing as too much soil in soil blocking
It’s okay if you have to redo soil blocks, they won’t be perfect all the time..that okay!
Mist your soil blocks with a spray bottle of water, preventing your seeds from washing away.
Check your soil blocks every day to stay on top of watering, add a little bit of water at a time.
Soil Blocking FAQ
How do you water soil blocks?
When you start seeds in soil blocks the blocks are moist enough that you don’t need bottom water. After your seeds start growing watering your soil blocks from the bottom is very effective in preventing plant diseases.
After you cover the seeds with soil mixture or vermiculite (which is what I do) you can spray the top of the blocks with water lightly with a spray bottle. I use this one!
For water maintenance, I pour water into the tray (bottom water) my soil blocks are on, little by little. Then I wait till the water is absorbed by the blocks until the soil blocks look moist.
If water is free-standing in the try after 10-20 minutes, I pour it out of the tray by slowly tipping the tray top to the side.
Can you bottom water soil blocks?
I would recommend recommended to water from the bottom to keep plants healthy. Bottom watering little by little helps you maintain the amount of water your soil blocks get.
You will be able to physically see the soil blocks soak up water which can help you avoid overwatering.
How often should you water soil blocks?
You should check the moisture of your soil blocks every day to know when to water them. I usually water every other day for bigger blocks and smaller blocks need to water a little every day.
Try to avoid them drying out completely since it can be harder for the blocks to soak up water if they get too dry.
Do you cover seeds while soil blocking?
Yes, but not always. You don’t have to cover seeds depending on if they need to be covered to germinate. My rule of thumb is to cover with vermiculite for all seeds, except for big seeds.
For example, I use left-over soil blocking mix to lightly cover sunflowers and moringa tree seeds to help provide more coverage so the plants can germinate better.
When do you transplant soil blocks seedlings?
Transplanting soil block seedlings depends on what size soil blocking your seedling are in at first. This can be done first by moving up the plant to a bigger soil block first before transplanting outside.
Soil block seedlings should be moved depending on which size soil block you used in the beginning. If you have a seedling in a 3/4 inch soil bock first, then moving it up to a 1 ½ inch or 2-inch soil block needs to happen before hardening off the plant so it can be ready to transplant.
How do you know when to move them up to a bigger soil block?
A good way to know to move up your seedling is if the roots are taking over the soil block or the plant seems bigger than the soil block itself.
Hardening them off will be the last step before transplanting them outside.
Soil Blocking Final Thoughts
Are soil blocks worth it?
It’s a person’s preference if you like soil blocking or not but only you can determine if it is worth it. The work and supplies you put into this seed-starting method will pay off in the long.
You can use multiple types of seed starting instead of using just one, so soil blocking is a great alternative.
The way all the pros and cons we mention and see if soil blocking is right for you. I love soil blocking and think it is always a good idea and I most defiantly will use this method in every growing season.
Are you going to make the soil blocking investment? Let me know in the comments!